Monday, May 31, 2010

Hurray for Strawberry Season!


There is no better argument for eating in season than a June strawberry. There is no comparison between what goes by the name "strawberry" in those #1 plastic containers that come shipped from California year round and a real strawberry. The flavor and smell of a real strawberry are swoon inducing. Deep red, juicy and super sweet... biting into one is like biting into summer.

When strawberry season rolls around (the month of June in Connecticut) you know that Summer has arrived. Strawberries get to be the first and to me are the king of the berries. I get so excited for them because their season is so short. I feel that I must hurry up and eat as many as I can because once they are gone they are gone and I'll have to wait for next June to have them again.

I am a strawberry purist. If I am going to eat a strawberry during it's season, I am not cooking it. No muffins, cakes, crisps, pies. I like my strawberries the way nature intended them, eaten raw. The most "cooking" I'll do to a strawberry is to macerate them in a little bit of sugar. This pulls those lovely strawberry juices out to create a nice sauce. No cooking required. I have a bunch of strawberry recipes I will be trying out this June, but the one I am sharing today is an old favorite. The nice thing about this dessert is that if you are in a rush, you can buy most of the components (pound cake, lemon curd) at the grocery. But take the time to make it from scratch. You won't be disappointed! This pound cake recipe makes two cakes and freezes really well so you can make that ahead and just defrost the morning you plan on serving this.

Happy Strawberry Season!


Grilled Pound Cake with Lemon Cream & Strawberries

One cake and two pints of strawberries should get you at least 8 servings

1 pound cake (recipe to follow) sliced about an inch thick
Lemon cream (recipe to follow)
2 pints strawberries, quartered
1-2 TBS sugar (depending on how sweet your strawberries are)

Toss strawberries with sugar and let sit for 15 minutes.

Meanwhile, heat grill. Place slices of pound cake over medium heat and grill until lightly brown with nice grill marks on both sides. Don't burn them!!! About 2-3 minutes per side.

Place a slice of cake on each plate. Top with a couple spoonfuls of lemon cream and then a few more spoonfuls of strawberries and their juice. You could also throw a sprig of mint on top if you have one laying around in your garden for a little more color. Enjoy!!! YUM!!!!


Pound Cake
from Ina Garten

Makes 2 loaves

1/2 pound (2 sticks) unsalted butter, at room temperature
2 cups granulated sugar, divided
4 extra-large eggs, at room temperature
3 cups all-purpose flour
1/2 teaspoon baking powder
1/2 teaspoon baking soda
1 teaspoon kosher salt
3/4 cup buttermilk, at room temperature
1 teaspoon pure vanilla extract


Preheat the oven to 350 degrees F. Grease 2 (8 1/2 by 4 1/2 by 2 1/2-inch) loaf pans.

Cream the butter and granulated sugar in the bowl of an electric mixer fitted with the paddle attachment for about 5 minutes, or until light and fluffy. With the mixer on medium speed, beat in the eggs, 1 at a time.

In a large bowl, sift together the flour, baking powder, baking soda, and salt. In another bowl, combine the buttermilk and vanilla. Add the flour and buttermilk mixtures alternately to the batter, beginning and ending with the flour. Divide the batter evenly between the pans, smooth the tops, and bake for 45 minutes to 1 hour, until a cake tester comes out clean.

When the cakes are done, let them cool for 10 minutes. Take them out of the pans, place them on a baking rack and allow them to cool completely. Wrap well, and store in the refrigerator or freezer.


Lemon Cream

Finely grated zest of 1 lemon
1/4 cup fresh squeezed lemon juice
2 1/2 tablespoons sugar
1 large egg
1 large egg yolk
Pinch of salt
3 tablespoons unsalted butter
1 cup heavy cream

Set a strainer over a medium bowl. In a small saucepan, combine half of the lemon zest with the lemon juice, sugar, egg, egg yolk, salt and 1 tablespoon of the butter. Cook over moderate heat, whisking constantly, until thickened, about 5 minutes. Immediately strain the curd into the bowl. Whisk in the remaining lemon zest and 2 tablespoons of butter. Press plastic wrap directly onto the surface and refrigerate until cool, about 15 minutes.

In a medium bowl, softly whip the cream. Fold the lemon curd into the whipped cream and refrigerate for at least 15 minutes. This can be made up to 2 hours before serving.
Saturday, May 29, 2010

Where's The Bean (Burger)?


I'm always looking for a way to be "healthy." This usually entails trying to give up something in my diet. Past attempts have been cheese, sugar, bread, fried food, etc. etc. As you can most likely guess, these have never worked out for me. I love food way too much to deprive myself of anything. Even when I do ban something from my diet, as I have with beef for the last couple years, there is always a caveat. I am "allowed" to eat beef if I know where it has been sourced from and if it is grass fed. Simple enough. So now, I eat it so infrequently that it really is a treat when I do.. and I savor that piece of meat!!

Recently there has been talk in my house about eating less meat. This doesn't mean giving anything up, just less of of it. Coming up with a weekly menu just got a little bit harder, but I am always up for a food challenge. Enter my friend Kelly. She has been a pescetarian (one who eats seafood but not mammals and birds) for roughly 14 or 15 years. I have always been intrigued by this type of deprivation (as I see it!) and interested more so in what Kelly eats. I am always asking her what she is having for dinner and making a mental note of it. One thing that she has answered to my "what's for dinner" inquisition has been black bean burgers. She has always told me how good they are and how she eats them all the time, but not until recently have I really made a move for the recipe.

Now that I have this black bean burger recipe and have tried it, I can truly say that I would take this over a turkey or grass fed beef burger any day. I have changed the original recipe to add some color with the addition of vegetables, but can see how this could be great with whatever you do or don't add to it. The flavors in the burger give it South of The Border appeal, so Kelly told me she tops hers with Monterrey Jack cheese and guacamole. I did just that. On the 2nd burger (the next day, mind you!) I happened to see my bottle of sriracha in the fridge and (though it is not a Mexican condiment!) it was so good with this burger and gave it a big kick! You could add salsa to stay true to its roots if you like, but the guacamole is a must. I also added some more heat with a slice of pepper jack cheese melted on top. I could eat this burger everyday. And since you can make the mixture, refrigerate and then cook whenever, you surely could eat it everyday (as I have this week)!!

Black-Bean Burger
adapted from Gourmet Magazine

makes 4 or 5 big burgers


2 (15oz) cans black beans, rinsed, drained well
3 Tbs mayonnaise, plus more as needed to make burger moist ( I like using Spectrum Canola Mayonnaise)
1/3 cup panko breadcrumbs ( you can use regular breadcrumbs but I like panko because they are a lot crunchier)
2 tsp ground cumin
1 tsp dried oregano
1/4 tsp cayenne pepper (you can add more of less depending on how spicy you want them)
2 large pinches of kosher salt (or to taste)
1/4 cup finely chopped cilantro
1/2 red bell pepper, finely chopped
1/2 yellow bell pepper, finely chopped
3 Tbs olive oil (you could use canola or whatever you typically cook with)
hamburger buns, warmed in the oven or grill
sliced pepper jack cheese
guacamole
Sriracha (if you like lots of spice like me!)


Mash (blend, pulse) half of the beans along with mayo, panko, cumin, oregano and cayenne until everything is mixture together well to make a sort of puree or paste. Stir in cilantro, rest of the beans, peppers and salt.
Form mixture into patties.
Heat skillet over medium heat until you can feel the heat radiating off the bottom. Add oil and coat pan (I do it this way to create a non stick surface on my stainless steel pans). Cook burgers for a total of 5 minutes, flipping half way through. I put the cheese slices on top and then move the entire pan to the oven for a few minutes to melt the cheese, but you could just do that on the stove top too. Add toppings and enjoy!

I have yet to try this on the grill, but my guess they would come out great. Just be careful handling them when you flip so they don't fall apart. I will try them grilled next week, and will also try the addition of corn. If you do so before me, let me know how they come out!

BTW.. the photo I have posted is the picture from the Gourmet website, not my own.... I forgot to take a picture of these when I made them this week (all I could think about was eating them!!). When I make them again, I'll make sure to take a picture.

Happy Memorial Day!!

Thursday, May 27, 2010

I Scream, You Scream, We All Scream

There has been a lot of experimenting going on in my house lately. It is just too bad it hasn't been on different types of healthy salads. Instead, I have been trying my hand at ice cream making. A few months back I decided that if I wanted to eat "junk" food, I would need to make it myself (Michael Pollan's Food Rule #39 "Eat all the junk food you want as long as you cook it yourself".) I stopped buying ice cream.... then needed ice cream. I didn't own an ice cream maker so while out one afternoon with my mother, I mentioned this, and before I knew it I was the proud owner of a Cuisinart Ice Cream Maker.


It actually started out pretty healthy. The first recipe I tried out in my new machine was Lemon Sorbet. Such a simple treat, made out of nothing but water, sugar, lemon juice and lemon zest. Because of the deep lemon flavor of this sorbet, a little goes a long way. After I got the thumbs up on this one, I got a little fancier. For my first foray into ice cream making I tried my husband Mike's favorite combination of chocolate and peanut butter. It came out just okay.... I realized later that I cooked the chocolate custard too long, turning it into more of a pudding and therefore making the ice cream way TOO thick. Oh, and I put way too much peanut butter in it. I will need to try this one over again in the future.

Now, my two next attempts at being a glacier were much more successful. I now knew the importance of the custards consistency in the final frozen product. I decided next to go with my favorite ice cream flavors. After seeing a beautiful, fragrant mint plant at Whole Foods, I decided I needed it for my garden and that the first thing I would make with it would be Mint Chocolate Chip Ice Cream. I went home and researched recipes, finding that most involved the use of peppermint extract instead of the fresh leaves.... which made sense. I was intent on using the leaves, so I finally came across a few recipes and after reading reviews, decided on one of them. I soon realized that my little mint plant was not going to cut it. I need A LOT of mint. For this 1 quart recipe, I needed two bunches of mint. After all the steeping and cooking and more steeping, the finished product was really good. As my husband said, "if you didn't know what mint chocolate chip ice cream tasted like, this is what you would expect." It was herby is a good minty way and the consistency this time was perfect. The 70% dark chocolate (almost two full bars) made sure there was a true chocolate taste in each bite.

The last ice cream I made was Coconut-Chocolate Chip. I love coconut and chocolate together but never can find it in the same ice cream or gelato. This was another success, and my favorite so far. Using coconut milk gave it the great coconut flavor, and toasted coconut flakes gave it great coconut texture. The addition of the Green & Black 70% dark chocolate (1 1/2 bars) just made it plain amazing.

With the unofficial start of Summer upon us this weekend, I don't think there is a better time to try your hand at ice cream making. Top the weekend's BBQ off with a big scoop of homemade ice cream. Your family and friends will be WOW'd!!!

Happy Memorial Day!!

BTW.. I will post the Mint Chocolate Chip recipe next week!


Lemon Sorbet
From the Cuisinart Website


3 cups sugar
3 cups water
2-1/4 cups freshly squeezed lemon juice
1-1/2 tablespoons finely chopped lemon zest

Combine the sugar and water in a large saucepan and bring to a boil over medium-high heat. Reduce heat to low and simmer without stirring until the sugar dissolves, about 3 to 5 minutes. Cool completely. This is called a simple syrup, and can be made ahead of time. Keep refrigerated until ready to use.
When cool, add the lemon juice and zest; stir to combine. Turn the machine on. Pour the lemon mixture into the freezer bowl, and mix until the mixture thickens, about 25 to 30 minutes. The sorbet will have a soft texture similar to a freshly scooped Italian ice. If a firmer consistency is desired, transfer the sorbet to an airtight container and place in freezer for about 2 hours.
Remove from freezer about 15 minutes before serving. Makes 1 quart.


Coconut Chocolate Chip Ice Cream


2 cups half & half
1 cup coconut milk
1/2 cup sugar
6 egg yolks
1/2 cup toasted shredded coconut (put in a dry fry pan over med heat, tossing often, until lightly brown and fragrant)
6 oz dark chocolate (finely chopped)
1 tsp rum (this is needed to keep the ice cream soft)

Heat half & half and sugar over med heat in a heavy bottomed pot until steaming. Beat egg yolks in a bowl. Meanwhile chill coconut milk in a metal bowl over an ice bath (bowl full of water and ice). Place a sieve over the coconut milk.
Once milk is ready, add it slowly to the eggs (this is called tempering). You don't want to make scrambled eggs! Once they are all combined, pour mixture back into the the milk pot. Cook over medium heat, stirring constantly, until mixture thickens. It will be done when you can coat the back of a wooden spoon with the custard and after running a finger across the spoon it doesn't run. At this point it should be removed from the heat immediately and poured through the strainer into the cold coconut milk to stop the cooking. Make sure all the custard gets pushed though the sieve (this will remove all egg that scrambled).

Once mixture is chilled, stir in the shredded coconut, the pour into the ice cream maker. Churn for 20-25 minutes. Once done, fold in the chopped chocolate and rum and freeze in a container. Remove from freezer 15 minutes before serving. Makes 1 quart.


Monday, May 24, 2010

When Spring Gives You Rhubarb.....


I grew up eating rhubarb pies and square made by my grandmother. She had two large rhubarb plants growing behind her house and during Spring and early Summer there would always be some sort of tart treat for us waiting when we visited. I don't have a rhubarb plant, but during this time of year it can easily be found at the farmer's market, Whole Foods, or lucky for me, a friend's house.

The classic pairing for rhubarb is strawberry (though if you ask Martha Stewart, she would tell you that she would NEVER pair those two together since their growing seasons are not exactly the same....). I love a strawberry rhubarb pie, but have really fallen in love with the flavor of rhubarb on it's own.

Crisps have also become a staple in my house. If I need to whip up dessert, a crisp is the easiest way to go. No dough to make and you don't have to worry about the way it looks. It is all bubbly and smells fantastic while it's baking. The textures are wonderful too. The creaminess of the cooked rhubarb with the crunchy oat and almond topping is perfect. All you need to finish this off is a nice scoop of good vanilla ice cream or some fresh whipped cream. The perfect Springtime dessert.

Rhubarb Crisp

serves 6-8

2 lbs rhubarb- cut into 1/2- 1 inch pieces (no need to be exact here. Just try and cut them all the same size)
1-1/4 cups granulated sugar
1/4 cup all-purpose flour

for the topping:
1-1/4 cups all-purpose flour
1 cup rolled oats
3/4 cup light-brown sugar
1/2 cup slivered blanched almonds
1/2 teaspoon ground cinnamon
1/2 cup (1 stick) unsalted butter, melted

Preheat oven to 375

For the filling, combine rhubarb, sugar, and flour in an 3-quart baking dish. Let macerate (the reaction between the sugar and the rhubarb will make the rhubarb start letting out its juice) for 15 to 20 minutes.

For the topping, combine flour, oats, sugar, almonds, cinnamon, and butter in a large bowl. Work dry ingredients with fingers until all butter is absorbed.

Spread topping over rhubarb. Bake crisp until top is golden brown and filling is bubbling, about 45 minutes.

Thursday, May 20, 2010

Greek is Great


Hummus is easy. Really easy. When I am in the mood to create in the kitchen and don't have time to run to the grocery, hummus is what I turn to. With some pantry basics and kitchen staples you can quickly throw together this yummy dip. Hummus also lends itself to being a great base for lots of different flavors. You can add pretty much anything to the basic hummus recipe to jazz it up a bit. One of my favorite add-ins are roasted red peppers. You can either use jarred or homemade roasted peppers, whatever you have time for or laying around the house. I always keep a jar of them in the fridge. They are great to throw on a sandwich with goat cheese, use as a topping for pizza, add to salad, or, in this case, use to make hummus.

I don't know anyone who doesn't like hummus and you can use it in lots of different ways, not just as a dip for pita. One way is to use hummus as a sandwich spread and top with cucumber, sprouts, sliced tomatoes and arugula on whole wheat. The other way, and my personal favorite, is to use it IN Greek salad. This was inspired by a salad I had at California Pizza Kitchen (!!!!) a few years ago. I went back to get this salad about a year after I first tried it and found that they had removed it from the menu. So what was a girl to do... recreate it! Of course, I think that my version of this salad is a million times better than the one at CPK, so am thankful they no longer serve it. Otherwise I might not have been inspired to make it myself. This is a great summer salad, so I have a feeling that you will be making this one a lot in the coming months! The parts of this salad are fabulous on their own, but combined......YUM!!!!

Hummus Greek Salad (with or without grilled shrimp)
serves 6 as a main dish

Roasted Red Pepper Hummus (recipes follows)- can be made ahead
I bag Earthbound Organic romaine hearts
Greek mixed vegetables in dressing- can be made ahead (even better if you do!)- if refriderated, bring to room temperature before serving.
Grilled Shrimp (optional)


Place a heaping tablespoon of hummus on the bottom of pasta bowl (or whatever you use for salads). Spread around to cover bottom. Chop the romaine hearts and place about two handfuls in each bowl on top of the hummus (trust me on this!!). Top with a large scoop of the greek vegetables and finish off with some (4-5) grilled shrimp.

The best way to eat this is to mix everything together, starting with the bottom and working your way up so the hummus gets mixed into the romaine. You want to be able to get a little bit of everything in your mouth with each bite! I also like to serve this with some Stacey's Naked Pita Chips crumbled on top. They add a nice crunch to the dish.

Roasted Red Pepper Hummus
(adapted from The Barefoot Contessa Cookbook)

2 15oz cans cooked garbanzo beans (chickpeas), drained, with the liquid reserved
1 1/2 tsp kosher salt
5 cloves garlic, minced
1/2 cup tahini (sesame paste)
8 TBS fresh squeezed lemon juice (DO NOT USE BOTTLED!!!!!!)
3 TBS reserved liquid from garbanzo beans (or more if you like a less thick hummus)
10 dashes Tabasco
2-3 jarred roasted red peppers

Place all ingredients in a food processor or blender. Process until smooth ( or you can blend it for less time if you like chunkier hummus). Add seasoning to taste.


Greek Mixed Vegetables
from Ina Garten

1 pint cherry or grape tomatoes- sliced in half
1 English (seedless) cucumber- sliced lenghtwise, seeds scooped out with a spoon and sliced about 1/4 inch thick
1/2 red onion. sliced thinly
2 bell peppers (mix colors to make this salad more colorful!....1 red 1 orange or yellow)
1/2 lb good (goat/sheep is the best- I love Mt. Vikos) feta, cut into small cubes
1/2 cup calamata olives, sliced lenghtwise


Place all ingredients in a large bowl.

Dressing

2 cloves garlic, minced
1 tsp dried oregano
1/2 tsp Dijon mustard
1/4 cup red wine vinegar
1 tsp kosher salt
1/2 tsp fresh ground pepper
1/2 cup olive oil

Whisk together all ingredients except olive oil. Once combined, slowly add oil while whisking until combined. Pour over vegetables and toss. Add in feta and olives and gently combine.

This keeps in the refrigerator for about 5 days and makes a really yummy lunch on its own.

Tuesday, May 18, 2010

Oh, how I love you Ina Garten


Okay, so the cat is out of the bag. I LOVE Ina Garten. She is (one of) my food idols. Her manner of cooking is just what I like.. simple, fresh ingredients made into simple, delicious food. I have been a devotee of hers for not even a year, but I own all her cookbooks, have just about every recipe of hers on FoodNetwork.com saved to my recipe box and at one point was cooking her food every night. My husband, Mike, didn't even have to ask where I got the recipes during those months. I would just use the word "she or "her" and he would know who I was talking about.

Since last fall and winter, I have laid off making her food EVERY night, but out of that phase came a bunch of recipes that I now consider staples in our house. Which brings me to today's recipe..... The Perfect Roast Chicken. Okay, so it really isn't roasting season anymore but I felt the need to share this one today in honor of my friend Erin. A few weeks (maybe months.. ahem....) ago Erin was over at my house for a playdate with her cute little Katherine. While the kids were playing we were talking about, what else but, food!!! I was listening to Erin tell me that she wanted to learn how to cook and grilling her on what they eat a lot of in her house. Rotisserie chicken was one of those things that Erin found herself buying when she needed a simple meal for her family. Alethia (well actually Ina) to the rescue!!!

So I sent Erin home with what I think is the simplest, most moist and delicious chicken recipe I have ever cooked. It really is so good. The best part (besides how good it tastes when you make your own chicken) is that you then have this flavorful carcass (sorry, that is what it is.. ) to use to make your own chicken stock. No need to buy it in a box or can from here on out... with a few other simple ingredients that a lot of us having laying around the house at any given time, you can make and then freeze your own chicken stock! Talk about getting the most out of your food!

Ina's Perfect Roast Chicken
serves 3 to 4

1 4-5 pound roasting chicken ( I use either organic or Bell & Evans)
2-3 large yellow onions, sliced
Olive oil
Kosher salt
Freshly ground black pepper
2 lemons- quartered
2 Tbs unsalted butter- melted


Preheat oven to 425 degrees

Remove giblets (bag inside the chicken) and wash the chicken inside and out. Pat dry with a paper towel. Toss the onions with some olive oil and place in the bottom of your roasting pan/dish. Rub the chicken with the melted butter and sprinkle GENEROUSLY with salt and pepper, inside and out. Place the lemon quarters inside the chicken (you will have to really shove them in there!). Place chicken in roasting pan on top of the onions. Tie the legs together with kitchen string and tuck the wing tips under the body of the chicken.

Roast for 1 hour 15 minutes (check if ready by cutting between the leg and thigh. The juice that comes out should be clear.) Remove from oven and cover entire pan tightly with tin foil (the chicken will continue to cook while it rests and soak up some of the pan juices. This step is really important for moist chicken!!!). Let sit for 15 minutes. Slice the chicken and serve with the browned onions. I also like to serve this with sauteed broccoli rabe and garlic mashed potatoes. Don't forget to squeeze some of the roasted lemons on top of everything... they make this chicken extra delicious!


Homemade Chicken Stock
makes 2-3 quarts

Roasted chicken bones from recipe above (or rotisserie chicken if you must..)
3-4 carrots unpeeled and chopped into thirds
6-7 stalk of celery with leaves chopped into thirds
2 large onions, with the skin still on chopped in quarters
15 sprigs fresh parsley
10 sprigs fresh thyme
15 sprigs fresh dill
1 head of garlic, unpeeled and cut in half crosswise
10 whole peppercorns
1 or 2 Tbs kosher salt (to taste)

Place all ingredients in a large stock pot or dutch oven ( I use a 9 quart for this, but you could use bigger). Fill pot with enough water to cover everything. Cover pot, place on burner and bring to a boil over high heat. Once boiling, remove lid and lower heat to medium low (to maintain a gentle simmer). Cook for 2 1/2 hours (you could cook it for longer if you like but I do it this way because the flavor is still good, but I get more stock.)

Strain stock into a large bowl and allow to cool. Discard the bones and veggies. I like to put it in the refrigerator overnight and get it nice and cool before I put it into my plastic quart containers, but you can put it in warm if you like. This keeps for a few weeks in the refrigerator, but I almost always freeze mine. I always have a supply of homemade stock on hand. You'll be amazed at how much better your soups, rices and pot pies taste!

Note- This chicken stock can really be made with just about anything you have in your produce drawer. You could throw in turnips or parsnips, any kind of root vegetable, etc. It is a great way to use up produce before it goes bad. Same goes for the herbs... you could really use whatever you have. I have used oregano, rosemary and tarragon at one time or another. You could also make vegetable stock by omitting the chicken and adding additional vegetables. Lots of options here for getting the most out food just sitting around in your refrigerator.

Monday, May 17, 2010

Artisanal Food

I had a really hard time coming up with a website name for this blog considering just about any name I could come up with was already taken. I wanted something that defined me and my views on food. Artisanal Food to me is Good Food. Anything that took time and patience and started with quality ingredients, is handmade and did not spend time on a conveyor belt in a factory, to me, is considered artisanal. This is my kind of food. I love local, organic, homegrown food. I love to support the local farmers and try to buy most of my produce from within a 250 mile radius (especially during the summer months).

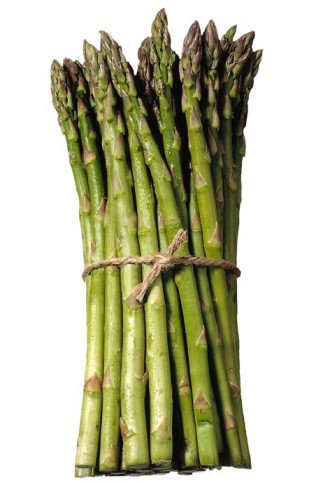
I like to cook seasonally too... I get really excited for asparagus since we don't cook it but during it's New England season of April-early June. I have been cooking asparagus at least twice a week for the past month, and have not tired of it yet! One of my favorite ways to eat asparagus is with a fried egg on top, with a little Parmesan and maybe some truffle oil if I'm feeling really crazy. You can eat this as an appetizer, side dish, light dinner, breakfast or lunch. It is simply amazing!

This is such a great combination of flavors, textures and colors. You have the crisp green asparagus, creamy orange (or yellow) yolk, sharpness from the parmesan and earthiness from the truffle oil. To me, a dish doesn't get better than this one!


Asparagus with Fried Egg

(feeds one- feel free to double, triple, etc.)

3-4 asparagus stalks (the thicker ones work best for this)- tough ends removed
1 egg (farm fresh and organic are the best for that beautiful orange color yolk)
Good Parmesan
Salt (kosher or a good salt like Maldon) and freshly ground pepper
Truffle oil (optional- but oh so good!)


In stovetop steamer, steam asparagus, sprinkled with a little salt, for about 2 minutes. (I make sure that water is boiling BEFORE placing vegetables in steamer to make sure you know exactly how long they have been cooking). You want the asparagus still crisp, NOT mushy!

Meanwhile, in a fry pan, heat a little butter and olive oil (equal parts) to coat (1/2 Tbs each in a medium pan) over medium /medium low heat. Cook to your liking (I like mine over easy, which takes no more than 2-3 minutes.)

Place asparagus on a plate. Slide egg on top, being careful not to break the yolk. Sprinkle a little more salt, some pepper and use a vegetable peeler to shave some parmesan on top. If you are using truffle oil, drizzle a little bit on top of the entire thing. A little goes a long way!

NOTE- To remove the tough ends from the asparagus stalk, simply bend the asparagus near the end. The asparagus will snap at the exact point to remove the part you don't want to eat!